Tuesday, December 27, 2011

Surprise! It's a Pumpkin Pie........

inside a cupcake!!!


Yes, you read that correctly! I took on the tedious task of baking this masterpiece. I baked pumpkin pies in to cupcakes!!!

There has to be some good reason why I decided, the day after Christmas, to tackle such a thing, right???

Yes.

There is.

My good friend, Lauren, has a birthday coming up and these are for her! She LOVES pumpkin pie.....ok, that is an understatement.....she LOVES pumpkin pie.......ok, that is better! :) Lauren loves it so much that she would eat a whole pie by herself in one day and not think twice about it. As a birthday gift to her, I didn't want to make her a pumpkin pie though. Too boring........

One day, many months ago, I came across this freakingly awesome website, Bake It In A Cake. I saw that they had baked mini pumpkin pies into cupcakes!!!! WTF!?!?! How was that possible!?!?! Well, I snatched the recipe and have been waiting to make them ever since.

See, these cupcakes aren't something you bake up as a "just because" cake.....they have to have a special reason to be made.

When I found out Lauren's love for the pie, I knew these would be spectacular and blow her away! She is so animated, so I can't wait to see the look on her face (or the voicemail I will receive) after she bites into one of these!


Pumpkin Pie {in a} Cupcake
(as adapted from Bake It In A Cake)
Omg....look at that!!!!! In case you need an anatomy lesson of what is going on here, I put this together for you:


This is no easy task.....oh no it's not. It takes a lot of work, but every second is worth it in the end, I promise you that!!!!

INGREDIENTS:
*There are a lot of ingredients that go into this masterpiece, so bare with me! I am going to list them in sections for you! :)

Crust:
You can use a store bought crust or any crust recipe you may have and love. If you do not have one, here is my favorite one! :)

Pumpkin Mix for Pie:
(as adapted from Libby's)

3/4 cup granulated sugar
1/2 tsp salt
1 tsp ground cinnamon
1/2 tsp ground ginger
1/4 tsp ground cloves
**I used 1 3/4 tsp of my homemade pumpkin pie spice. You can use PPS or add in each spice individually if you would like!
2 large eggs
1 (15 oz) can of Libby's 100% Pumpkin
1 (12 oz) can evaporated milk


Cupcakes:
(as adapted from Bake It In A Cake)


1 1/2 sticks unsalted butter, at room temperature
8 oz cream cheese, at room temperature
1 1/2 cups granulated sugar
2 1/2 cups flour
3 eggs
2 tsp vanilla
2 tsp baking powder
1/2 tsp baking soda
1/2 tsp salt
1 1/3 cups whole milk (I only had skim milk and almond milk around, so I used the skim milk and they still turned out just fine!)


Frosting:
(slightly adapted from Bake It In A Cake)


2 sticks unsalted butter, at room temperature
8 oz. cream cheese, at room temperature
2 cups powdered sugar
1 tsp pumpkin pie spice (again I used my homemade one!)


DIRECTIONS:
-Preheat oven to 425 degrees

-"Assuming" you have your pie crust already, go ahead and roll it out


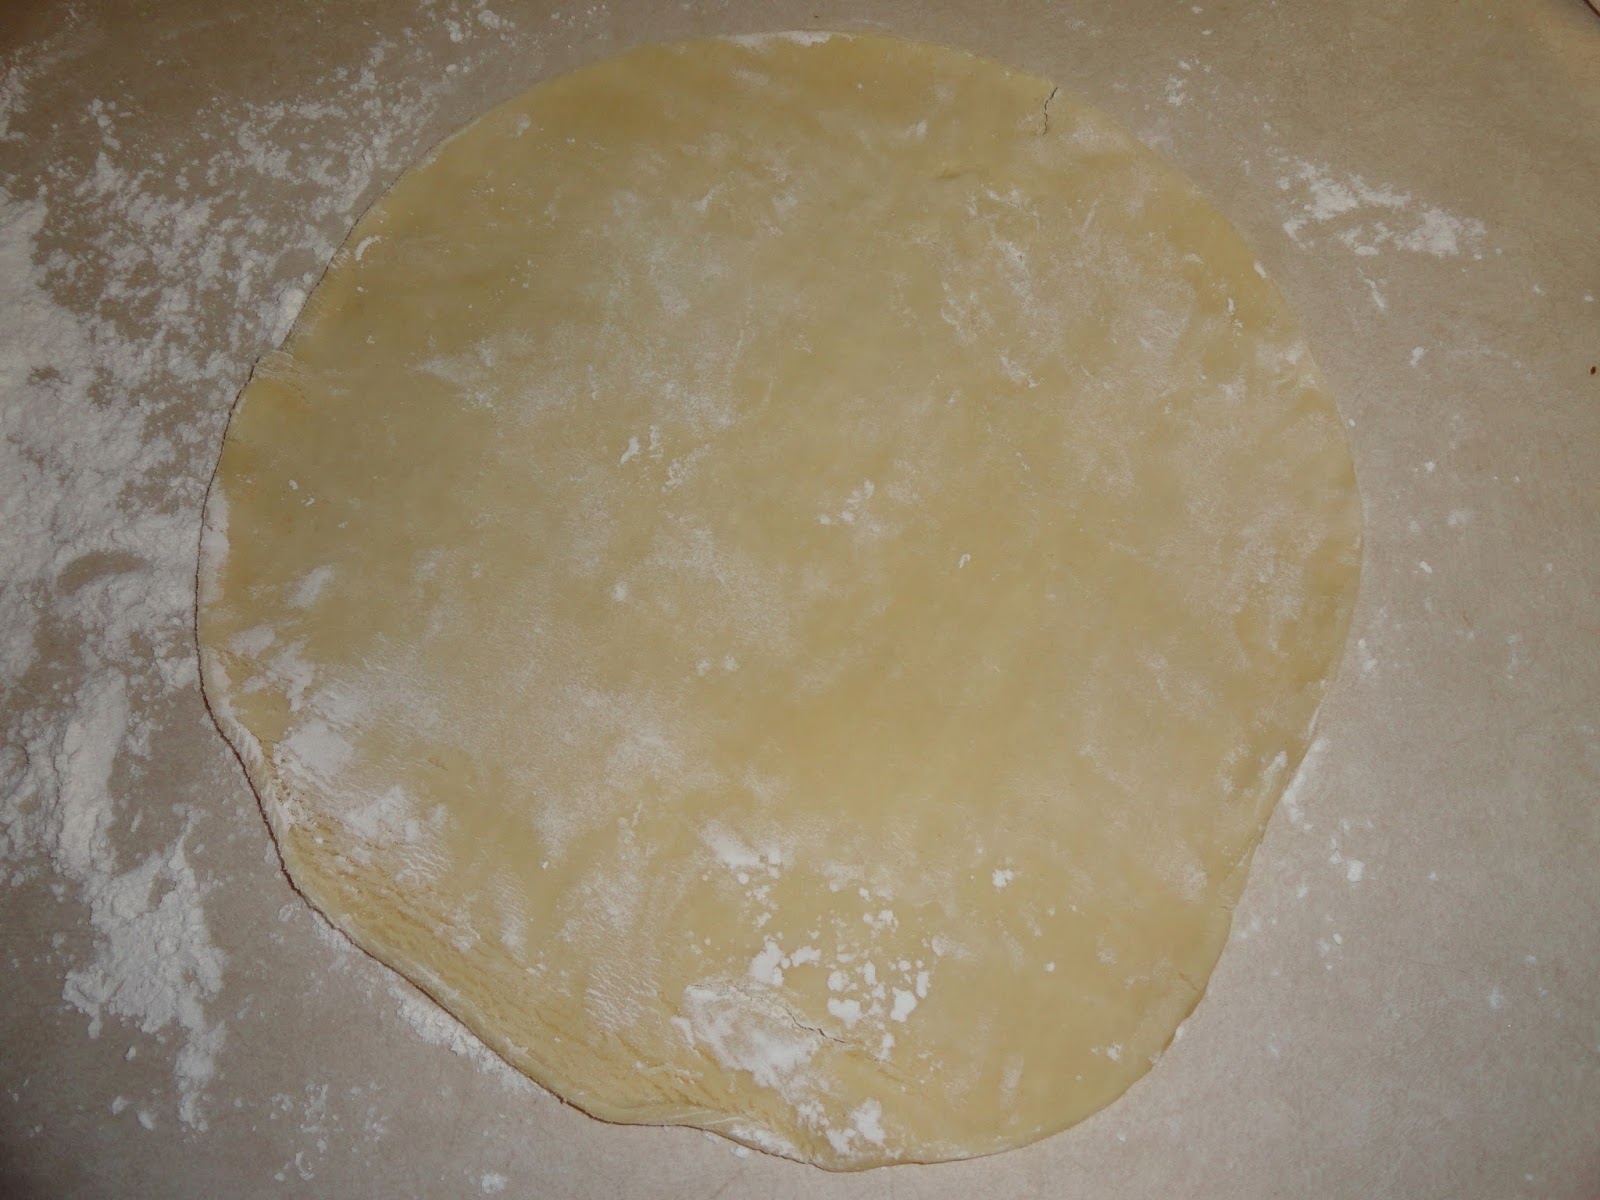
-Using the rim of a drinking glass, cut circles out of your dough

-Gently press each circle into a mini cupcake pan to create a small pie shell
They don't have to be perfect, as you can see from above! ;)

-Prepare pumpkin pie mix:

-Mix sugar, salt, cinnamon, ginger, and cloves in medium sized bowl

-Beat eggs in a large bowl

-Stir in pumpkin


-Stir in sugar-spice mix

-Gradually stir in evaporated milk

Yum!!! I could drink this entire bowl!!!

-Pour mixture into prepared pie shells (about 3/4 of the way full)

-Bake pies at 425 degrees for 7 minutes and then reduce the temp to 350 and bake for an additional 10 minutes or so, just until the crusts are browned and the filling is set

-Remove from oven and allow to cool while you prepare your cupcake batter

-For the cupcake batter combine the butter and cream cheese in the bowl of a stand mixer

-Mix at medium speed for about 90 seconds (you want the ingredients well incorporated)

-Add in the sugar and mix until mixture is fluffy


-Add in the eggs one at a time and mix well after each addition

-Add in vanilla, baking soda, baking powder, and salt
Baking powder, baking soda, and salt

Vanilla!
-Mix in the milk and flour, alternating between each
Milk

Flour
-Scrape down the sides of the bowl and the bottom to make sure all ingredients are being incorporated well

-Beat again on medium-high speed for about a minute.....it should be smooth and creamy

-Line a [normal sized] cupcake pan with cupcake liners

-Pour 1 TBSP of cake batter into each cup

-Now, take a mini pumpkin pie and place it into the cups, gently pressing down (you don't want the pie to touch the bottom)
We will see you guys later!

-Pour more cake batter on top of each pie making sure to cover the top of the pie and the sides

-Bake at 350 degrees for about 25 minutes or until the cakes are lightly browned
*I baked mine for 25 minutes and they came out very brown. I would suggest reducing that time down to 20 minutes and checking in for any time needed after 20 minutes**

-Remove from oven and allow cakes to cool 10 minutes before placing on cooling rack. In the mean time, prepare your frosting

-In the bowl of a stand mixer, cream together the butter and cream cheese until they are well incorporated


-Whip in the powdered sugar, one cup at a time until the mixture is smooth and creamy


-Add in the pumpkin pie spice and mix until all is incorporated

-Give the bowl one last good mixin' with the hand to make sure all the ingredients are mixed well

-Frost cupcakes anyway you would like!!!!!
I packaged them up for Lauren! <3

These were so fun to make, even if they were VERY time consuming. Making them for a great friend is worth all the blood, sweat, and tears! ;)


To my dear friend Lauren.....Happy Birthday!!!!! I love you!!!!!!!

<3 much, as always!!!
Amy


Saturday, December 24, 2011

Fortune Cookies For Grandma!

Grandparents are the hardest people to shop for when it comes to presents. Each year I have the hardest time figuring out what to get them. My grandpa always seems to get some Jack Daniels gift set from us and my grandma, well, she gets the poor end of the stick and winds up getting some lotion set from Bath and Body Works that she rarely uses. She always says she loves getting those types of gifts, but a year later, they are still sitting in her bathroom, unopened.

One year I had a genius idea and made them an awesome calendar off iPhoto. We had a family reunion that year so I used all the pictures from that and put them in to the calendar. My grandma LOVED it! I thought I had scored!!!!!! But I was wrong......DEAD WRONG......She loved the calendar all right. Oh yes she did! She loved it so much that [after looking at it on Christmas day] she put it back in the plastic wrapping it came in, stuck it in a drawer, and never took it out again. That calendar didn't see the light again until I asked my grandma about it, oh somewhere around 6 months later, and she pulled it out. I told her that I had wanted her to use it....she told me it was a keepsake and didn't want it getting ruined.

IT'S A CALENDAR!!!!


Calendars are only good for 1 year (well, and the dates will be the same 6 years later, but that's besides the point) and I wanted her to have all year to enjoy all those pictures of the whole family.

So another year has come and here I was again, trying to decide what to get my grandparents. My grandpa was easy.....he got a bottle of Jack Daniels (big surprise) and an engraved flask that says "Grandpa's Secret Stash". ;)

Now for my grandma. I am a HUGE blog stalker follower and was out looking for something great to bake my grandma. One day it finally came to me!!!!!!

I received an email about quick and easy baking gifts......on that list was personalized fortune cookies!!!!

PERFECT!!!!!!


I was so stoked to finally have a really thoughtful and great gift for my grandma. The recipe was easy and they were fun to make. It also gave me the chance to write some nice things to my grandma that I normally wouldn't tell her on a day to day basis. I just want her to know how appreciative I am of her and how much she means to me!!!!

Here's to you, Grandma!!! <3


Fortune Cookies
(as adapted from Babycakes 291 on All Recipes)


INGREDIENTS:
3 egg whites
3/4 cup sugar
1/2 cup butter; melted then cooled
1/4 tsp vanilla extract
1/4 tsp almond extract
1 cup all-purpose flour
2 TBSP water

Did you see that GREEN egg!?!?!


Did you know that green eggs are real!?!? And did you know that green eggs come from hens with green ear lobes!?!?! A little fun knowledge for you on today's blog post!!!! Did your fortune cookie tell you that you were going to learn something useful today? Well, sorry you didn't learn anything USEFUL here! ;)

I have a wide variety of egg colors in my fridge.....

Ok, just had to share those.....back to those fortune cookies!!!

DIRECTIONS:
-Preheat oven to 375 degrees

-Line cookie sheet with Silpat or parchment paper

-Print out fortunes and have them folded and ready to go (this is an important step because you don't have much time to work with the cookies once they come out of the oven!!! Definitely NOT enough time to cut them, fold them, place them in cookie, and mold cookie.....)
The fortunes for my dear grandma!!! <3 Feel free to use any here if you would like, but only if you truly mean them! :)
-In the bowl of a stand mixer, whisk egg whites and sugar together on high speed until frothy. This takes about 2 minutes


-Reduce speed to low and mix in melted butter, vanilla and almond extracts, water, and flour, one at a time, mixing well between each addition
There goes the butter

And the flour
-Consistency should resemble a pancake batter

-Spoon the batter onto prepared cookie sheet and spread around into 3 inch circles, leaving room for spreading
*I advise to only make 2 at a time until you get the hang of it. The cookies will set quickly and you don't want any of them to set before you get the fortunes in them!!!

-Bake for 5-7 minutes (I only baked mine for 5 minutes) or until edges are golden brown
Perfect cookies!
-Quickly remove one at a time, place fortune in center of cookie and fold in half

-Once folded in half, quickly pick it up and fold again in half over lip of coffee mug to get the correct arch
**You can view a video to see how to correctly do it. It helped me out so much with the folding technique!

-To hold the shape, place the cookie in a muffin tin until it completely cools
All my cookies.....some trials and errors, but all in all good!

After baking them I went down to my favorite Chinese restaurant and asked them if I could buy a couple of "to-go" boxes from them. I have grown up eating here and their food is amazing! It was funny, though, because the guy working there was somewhat dumbfounded when I asked to buy a couple of empty boxes. I asked how much he wanted for them and he told me that he didn't even know how much to charge me and to just take them! Merry Christmas to me.....and a HUGE thank you to him and Peony's for helping make this gift for my grandma!!! <3

I placed some tissue paper into the boxes and then placed the cookies inside.

I then trimmed the excess tissue paper off (since it was too much to fit into the box and the cookies were starting to get crushed) and closed them up!!! All ready for grandma now! :D

I cannot wait to give these to my grandma tomorrow!!! I made a few extra cookies and they are delicious, so not only are they a sweet gift, but they taste great too!!!! Double score!!!!

I hope you all are excited and ready for Christmas tomorrow. I know that I am. I am a little nervous, though, since, for the first time EVER, my in-laws will be coming up to celebrate Christmas with my family! This will be the first time since mine and Davey's wedding day that both families will be together under the same roof!!!!

WISH ME LUCK!!!!!


Thanks everyone and have a VERY Merry Christmas!!!!
<3 Amy


PS: Feel free to email me if you would like my list of fortune cookie sayings! :)