Friday, October 28, 2011

Butterfingers......made at home!

BuTtErFiNgErS!!!!!!! These have got to be one of the best candy bars ever created! I love them and can never have enough. I have never put much thought into what EXACTLY a Butterfinger is. All I know is that it is delicious and I don't care!

One night I was on Facebook (big surprise there!!! ;) ) and saw a post for homemade Butterfingers! What!?!?! Is that even possible? Me being the little curious one that I am, I had to check it out. The recipe.....it was short.....it was simple.....scarily simple......and consisted of Candy Corn!?!?!?!


Ok, weird, especially since I had never been a big fan of Candy Corn (until like 3 weeks ago when we received a baggy at the day job and now I just love it!!!! Yummmmm!!!!). I thought to myself, this is something I am going to have to try.

Well, with being days away from Halloween, the hubby and I have both been having very busy nights getting things ready for the upcoming desert season. This means getting the truck all ready to take out, getting my quad out and making sure everything runs right, dealing with trailers and all that good stuff. The other night while Davey was out in the garage working on stuff I got a craving for some chocolate peanut buttery yumminess! I thought to myself, this would be the perfect time to make those Butterfinger bars......so I did! :) Yup, just up and baking like that!!!!!


Homemade Butterfingers
(as adapted from In Katrina's Kitchen)


INGREDIENTS:
3 cups Candy Corn
1 cup Peanut Butter
Chocolate for dipping

DIRECTIONS:
-Place candy corn in a microwave safe bowl and heat up at 15 second intervals until candy corn has melted
-Add in peanut butter and stir like crazy!

This is what the mixture will look like! Mmmmmmm!!!!!

-Place mixture in a greased 8x8 pan and let cool for about an hour
-Melt chocolate and pour over the candy corn/peanut butter mixture
-Place in fridge until chocolate hardens
-Cut into any size you want and gobble up!!!!! :D


I used a baby food container to make mine! :) It worked really well, just made one FAT Butterfinger, but nothing wrong with that, right?


I couldn't believe how much it tasted like a real Butterfinger! I used dark chocolate instead of milk chocolate, but it still tasted so good! It's not crispy like a true Butterfinger, but it was still delicious!


Off to workout I go now!!!! Again, have a wonderful weekend!!!!

Love of <3,
Amy

Thursday, October 27, 2011

Chocolate Chip and [Halloween] Oreo Cookies

Here we are.....it's Wednesday night and I have yet to post about my cake I baked for my dad's birthday!!! I am sure you all have been wondering how it turned out and what my dad and the rest of my family thought of it. Well, let's just say........
 My dad taking the first bite!

Analyzing......
.
.
.
.
.
.
.
.

My dad described it as a flavor explosion!!!! This made me so happy! He absolutely loved it! I cut him a huge slice and he went back for seconds as soon as he was done with the first piece!

Giving me the evil eye since I caught him eating a second slice!

My grandparents and uncle were both very impressed with my cake and couldn't believe the baker that I have become! :) The hubby even tried a bite!!!!!!


He said it was really good!!!!


He even went back for a second bite!!!!

For the hubby to try something "sweet" and actually like it is a miracle. Maybe that would explain why I saw flying pigs earlier that day...... ;)

(Hehehehe.......my grandma bought Davey his favorite dessert, banana cream pie, so he had dessert as well......what a sweetie she is! God I love her! :) )

I was so pleased that everyone just loved my cake! In just 2 days, the whole cake was gone!!!!! Yes, gone!!!! Wow!!! Guess I know what to make for his birthday next year. Maybe this will become a new tradition for my dad's birthday!!! :)

This is what was left of the cake after the first night!!!


After dinner and dessert, we all sat down to play some cards. We always end up playing a game called Garbage. I lost miserably the first time around with a record score of 650!!! The point is to have the fewest points possible! No one had ever seen someone get as many points as me......so I am changing the rules.......MOST POINTS WINS!!!! ;)

The birthday boy had a clean sweep and beat us all! We played a second game and this time, surprisingly, I actually WON!!!! And won for reals, not by my new rules! :D

While playing Garbage, my uncle told me he wanted me to bake him some cookies! This got my little brain going and I had to figure out what kind of cookies I wanted to make him. I have been wanting to make these little mini cheesecakes (I will make them eventually....so you will get to see them at some point) made with Halloween Oreos. I went out and bought 2 packages of Oreos, but when the hubby caught glimpse of them in the cupboard, he had to help himself. So here I was, left with an open package of Oreos that was now half gone. Good thing I bought 2 since I am going to need a lot more than half of a package to make those cheeseycakey goondesses!!!! Ok, so totally made up words, but that's the way I like to roll! ;) With the open package of Oreos in mind, and the fact that they have that super awesome orange cream, I knew I had to base a cookie off of those. I also wanted a cookie that I could share with our friends out at the desert this weekend. The only "for sure" cookie to get everyone to eat is a chocolate chip cookie. Like, how can you pass on one of those classic delights???? That's what I thought! I busted out all my baking stuff and started prepping away. 

***Davey had gone to the store to get a few things and came home to me baking at 9 in the morning on Sunday morning......he was not shocked, but still wanted to know what I could possibly be baking at 9am! LOL!!!!!

Chocolate Chip Oreo Cookies
(Chocolate chip cookie recipe adapted from Toll House)

INGREDIENTS:

2 1/2 cups all-purpose flour
1 tsp baking soda
1 tsp salt
1 cup (2 sticks) butter, softened
3/4 cup granulated sugar
3/4 cup packed brown sugar
1 tsp vanilla extract
2 large eggs
1 package mini chocolate chips (the original recipe calls for regular sized chocolate chips, but I used mini ones for my cookies
30 Halloween Oreo cookies, crushed (with big and small chunks.....)


DIRECTIONS:
-Preheat oven to 375 degrees
-Place Oreos in a plastic sealable baggy and crush away!!! :D (Just don't take out too much frustration on those poor cookies! You want some bigger chunks in there)
-Sift flour, baking soda, and salt into medium sized bowl

-Beat butter, granulated sugar, brown sugar, and vanilla in large mixing bowl


-Add eggs, one at a time, mixing well after each addition

-Slowly add in flour mixture

I stopped here and baked 4 cookies with this batter for my best friend's husband! He is a tad bit strange and loves chocolate chip cookies WITHOUT the chocolate chips! Gotta love him though! Hahahaha! ;) 

-Stir in chocolate chips

 Yuuuummmmmm.......drooooooollllll...........must resist eating whole bowl of cookie dough.......

-Stir in crushed Oreo cookies

Love the orangey swirls of Oreo cream goodness!!!! <3

-Drop by rounded spoonfuls onto ungreased baking sheet, or on Silpat baking mat
-Bake for 9-11 minutes, or until golden brown
-Let cool on baking sheet for 5 minutes and then remove to cooling rack


BIG chunk!!! <3


I just love how the orange cream gets swirled into the cookie!!!! :D Yummmm!!!! They sure were delicious!!!! I can't wait to share them with all our friends this weekend!! It's going to be a great time!


Have a safe and fun Halloween weekend and I have another recipe coming your way next week!!!!! Yay!!!!

<3Amy

Friday, October 21, 2011

Birthday Cake For My Dad!

The other night I was sitting, playing on my computer.....actually switching back and forth from being a Facebook stalker and checking out my favorite blogs.....when all of a sudden my computer made a familiar little "ding" sound. This little tone was my laptop's way of telling me that I had a new e-mail! Yay! I love when I get e-mail. 75% of the time it's just junk, so I finished what I was looking at before opening up my inbox. Surprisingly, it was NOT junk mail!!!! It was a letter from my uncle in Arizona. He was writing to inform me that he was going to be out visiting for my dad's birthday weekend. I don't get to see him much (mostly just around the holidays), so I was very excited to hear that he was making a trip out here! At the end of the e-mail he asked if I was going to be baking my dad a cake for the occasion.......well hmmmmm......to be honest, I hadn't even thought about baking him a cake......but any reason to bake is a good one for me!!! So I set off to think of the best cake to bake my dad!

I finally found a GREAT cake for my dad. Him and I have similar tastes when it comes to sweet things, so I figured if I would enjoy it, so would he! I decided on a pumpkin cake (since his birthday IS during PRIME pumpkin season) with gingerbread frosting (because YUM!!!). I have been so anxious to make it and have been thinking of ways to decorate it as well. While stalking looking at lots of food blogs, I found this awesome tutorial on how to do multi-colored frosting. Katrina from In Katrina's Kitchen showed how easy it is to pipe out some fancy frosting. I decided that this is how I wanted to decorate my dad's cake!!!!

After putting in a few hours at the day job, I came home and quickly started baking. I had high hopes for this cake and was hoping I could pull it off! So off I go....

Pumpkin Cake with Gingerbread Frosting
(as adapted from Avon Park High School)


INGREDIENTS:


1 cup vegetable oil
3 eggs
1 (15oz) can pumpkin puree
1 tsp vanilla extract
2 1/2 cups all-purpose flour (I used cake flour instead)
2 1/2 cups granulated sugar (I used Baker's Sugar)
1 tsp baking soda
1 tsp ground nutmeg
1 tsp ground allspice (I used Jamaican allspice)
1 tsp ground cinnamon (I used Roasted Saigon Cinnamon)
1 tsp ground cloves
1/4 tsp salt


DIRECTIONS:
-Preheat oven to 350 degrees
-Grease a cake pan
-Beat eggs
I tried to find a funny picture of eggs being beaten (like in a fight), but couldn't find anything....
SO ANY WAY.....
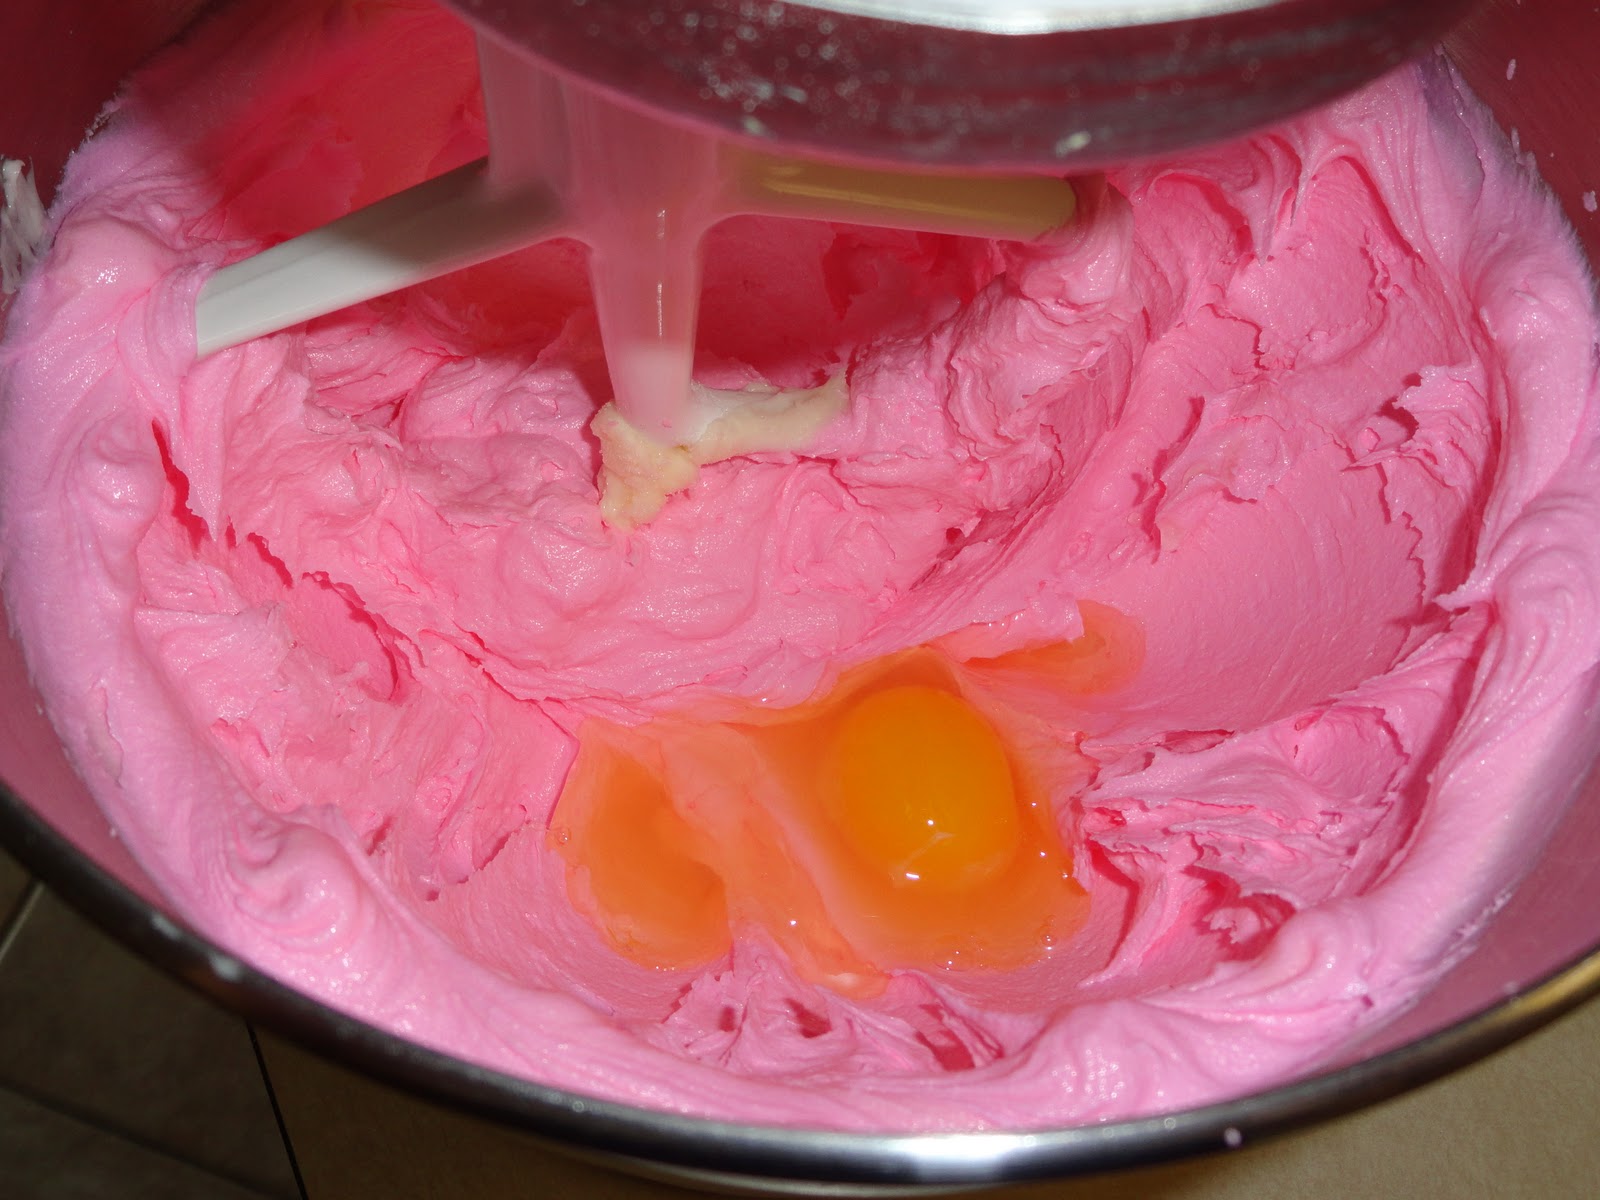
-Cream oil, eggs, pumpkin, and vanilla together

Have you ever seen oil and eggs "mixed" together? I never have.....it was so weird looking....
The egg looked almost powdery......it was weird, so I had to take a picture of it! :)

NOW.....back to what I was saying about creaming......

-Sift the flour, sugar, baking soda, nutmeg, allspice, cinnamon, cloves, and salt together.
 Getting ready to be sifted!

All sifted! :D

-Slowly add the flour mixture to the pumpkin mixture and mix until just combined.


 -Pour batter into cake pan and bake for 25-35 minutes (times vary depending on how deep your cake pan is) or until inserted toothpick comes out clean

Gingerbread Frosting


INGREDIENTS:
Some of the ingredients
1 stick butter, softened
2 TBSP Crisco
1 (2lb) bag powdered sugar
2 tsp vanilla
10 TBSP whipping cream
1 TBSP ground ginger
1 TBSP ground cinnamon
1 tsp salt

DIRECTIONS:
-Blend butter, Crisco, and vanilla together
-Add in powdered sugar and mix (it will become VERY dry and powdery.....just keep on keepin' on....)
-Add in whipping cream
-Once at desired consistency, add in salt, ginger, and cinnamon

-Beat for 1-2 minutes until light and fluffy


After the cake was cooled I leveled it off and got my frosting on!!! ;)

I had decided on a 2 layer cake, so obviously frosting had to go between the 2 layers.


 I wanted the cake to have a fall color scheme. After frosting the first layer of cake, I separated the remaining frosting into 5 bowls so that I could color each one. I wanted the whole cake to be a dark brown, so I added some "chocolate brown" food coloring to the first batch.

I mixed it up until I got the desired color. I then did the same with red, yellow, green, and orange.


I don't have fancy mixing bowls, sorry......but my awesome cottage cheese and sour cream containers worked JUST fine! :D

I frosted the whole cake with the dark brown frosting and then proceeded to prepare my piping bag for the multi-colored frosting!!!!

I laid down a sheet of plastic wrap and layered each frosting color on top of each other.....
When I decided to throw the green into there, I totally was NOT thinking about how it would then be Rasta coloring......hahahaha! Oh well.........

Once all the colors were aligned, I rolled up the plastic wrap, twisted one end, and then cut off the remainder of plastic at the other end and inserted it into my piping bag that was already fitted with a coupling. ALWAYS "burp" your piping bag before decorating the cake. You don't want any big sbloges coming out. I then went on to decorate the cake!!!

I ended up having a sbloge on my "y" on Happy......I did burp it but had a blockage and tried to clear it (off the cake) and it was coming out slow, so I just continued on, and then BLOP....a sbloge......I managed to somewhat fix it with a toothpick! :)


I just love how all the colors blend together. I just wish that it was more uniform instead of mixing all around, like the green is thicker in some areas than others, more yellow in some areas......but maybe that was due to using 5 colors (Katrina used only 3 colors....).

No matter what anyone thinks, I am super proud of myself for this cake. I feel it came out super awesome and can't wait to share it with my family tomorrow! :D <3


Ok, so now time for some big news!!!! I am very happy and excited to let you all know that I am signing up to do my FIRST half marathon!!!!! I know, I do triathlons, but have yet to tackle a half marathon (I hope to one day do a full marathon). It is in January and I am so excited! Nervous, but excited. I believe that I can do it......just have to prepare mentally and physically for it. The half will be local to me in and around the wineries in Temecula. It will be hilly, which means we are all gonna get a little silly, but it will be fun!!!!! 

Another big thing!!!! I have decided to partake in a cooking challenge. It is put on by Tina at Mom's Crazy Cooking. A topic is chosen (so this month it is mashed potatoes) and you go around onto other blogs and find a recipe you want to make. Then you make it, blog about it, and there is a "linky party" for all participants to view each recipe and vote on their favorites. The one with the most votes wins. You don't win anything besides the opportunity to post a cute little button on your recipe, but it does help get people to come and see your blog. I am trying to get my "name" out there, so I am hoping this is the first step! :D So look forward to that post from me in early November! 


Well, I have totally talked your eyes off tonight! Hope you all have a wonderful weekend! 

To end things off, I found this funny little photo caption the other day on Facebook and HAVE to share it with you all! :D 


Eat Your Meat!

Good night all! :D


Thursday, October 20, 2011

Crazy Week.....

This is going to be a quick and boring post.....I am sorry for being so MIA this week. It has been a crazy hectic one and I just have not been in the bloggin' mood. I am super excited to share a new recipe with you all tomorrow!!! I have been longing for this week to end so that I can bake it up! I am going all out and trying something spectacular......just hope I can pull it off. I know that if I can pull this one off, then my even more SPECTACULAR baking adventure in late December will be possible! :)

See ya all on the flip side......tomorrow that is! ;)

Have a great night! <3
Amy

Saturday, October 15, 2011

Cupcakes For The Cure

Who is glad that it is finally Saturday? I know I sure am! Sleeping in, drinking lots coffee, making and eating breakfast with Davey! <3 :D I just love Saturday mornings! This morning was the perfect start to the weekend. I made the hubs breakfast burritos and made myself some oatmeal. While making breakfast, I sent him off to the store to get me some bananas since I really wanted them in my oatmeal this morning. He came back with the biggest bananas I have ever seen! LOL! One of them was almost a long as a sheet of paper!!!!!

Holy smokes that's a BIG banana!!!! 


Breakfast was tasty, as always! I just love my oatmeal....seriously! I eat it just about every single day! Yum! I play around with adding peanut butter, pumpkin, bananas, strawberries, blackberries, blueberries......just about anything that would be good in oatmeal. Mmmmmmmm!!!!!!


Yesterday I started baking some cupcakes to sell to raise money for the Susan G. Komen Breast Cancer Research Foundation. I found this really cute idea on Love From The Oven for some yummy pink cupcakes. I whipped up a batch and they started selling right away! :D

Pink Velvet "Breast Cancer Awareness" Cupcakes
(as adapted from Love From The Oven)


INGREDIENTS:

1 cup unsalted butter, softened 
1 1/3 cups baker's sugar (regular granulated sugar would work just fine as well)
3 eggs
2 tsp vanilla extract
2 1/2 + 4 TBSP cups cake flour (or 2 1/2 cups all-purpose flour)
1 1/2 tsp baking powder
1/4 tsp baking soda
1/2 tsp salt
1 cup buttermilk
Neon Pink food coloring


DIRECTIONS:
-Preheat oven to 350 degrees
-In a large bowl, cream together butter and sugar


-Once light and fluffy, add in your pink food coloring (I used half of a tube of coloring)

-Blend well with the butter and sugar mixture


-Add in eggs, one at a time, beating well after each addition

-Add in vanilla and blend well

-In a separate bowl, sift together the flour, baking powder, baking soda, and salt

(I use powdered buttermilk, hence the yellow powder.....)

-Slowly add in 1/3 of the dry ingredients, then 1/2 of the buttermilk, then 1/3 dry, buttermilk, dry........you get the idea. 

-Mix until all ingredients are well incorporated
-Fill paper-lined cupcake cups 3/4 of the way full
-Bake cupcakes for 20-25 minutes (mine only needed 20 minutes), watching so that the cakes do not brown too much.
-Cupcakes are done when toothpick comes out clean after being inserted into center of cake
-Allow to cool for 10 minutes, then transfer to cooling rack to completely cool


For the frosting, you can use ANY frosting you like. I like to try new things, so I decided to also use this recipe that came with the cupcake recipe!!!! She calls it "My Favorite Buttercream Recipe" and I agree with her.....it's the best buttercream I have tried yet thus far!!!! :D

Best Buttercream Frosting!!!!
(as adapted from Love From The Oven)

INGREDIENTS:

1 stick unsalted butter, softened
2 TBSP Crisco 
1 (2 lbs) bag of powdered sugar
2 tsp vanilla 
1 tsp salt
Whipping cream


DIRECTIONS:

-Blend butter, Crisco, and vanilla together


-Slowly add in powdered sugar

-Mixture will become VERY dry.....just keep mixing in the powdered sugar.....it will all work out in the end, I promise!

-Slowly add in whipping cream, 1 TBSP at a time until desired consistency is reached (mine took 10 TBSP)
-You can then frost your cupcakes, or do like I did and add in some little "extras"!!! :D
Like glitter!!!!

Or maybe some Pink Sugar!!!!

-Then blend all together!!!!

SpRiNkLeY gLiTtErY gOoDnEsS!!!!!


Now I just hope I can beat my 5K time of 27m23s (that I achieved at the triathlon last weekend) at tomorrow's race!!! Wish me luck! :D


I have totally been neglecting the photo challenge this past week, so I will do all the catching up I need to!!! 


Day 21: Pretty Pattern

I found this cake at www.pinkcakebox.com and just loved it! I am not one for "pretty patterns". I don't do "pretty" too much. So this is "pretty" in my eyes! :)


Day 22: Trees

This picture was taken in August of 2010 after a tornado hit my grandparents' house. Living in Southern California, the last thing you would imagine happening to your house is being hit by a tornado. But that is what happened. It ripped the roof off of their house and did lots of damage. Here is a tree that was affected by the freak storm. It was very scary, but about 4 months later, my grandparents' house was back to normal! :)

Day 23: Sunset

Here is a sunset out in Blythe, CA. Our friends and I went out on the boat one last time before the sun set to do a little fishing. Me, not being a fisherman at all, did all the photography! ;) I love sunsets and I just wish that this picture did this sunset more justice!


Day 24: A Smile

Awwww! Davey's smile! He hates smiling, especially for the camera, so I am glad when he actually does a smile, even if it's goofy. And it just makes you smile looking at the look on Scrappy's face, like he is so mad......and then his daddy just loving the fact that he is so mad! Hahahahah!!!!! :D Big smile there!


Well, I better get on with the rest of my day. I have my workout already done and am ready to face the town!!!! ;)

Have an awesome weekend all!!!!
<3 Amy